How to Collect Amazon Return Fees | Quickest Way

Introduction
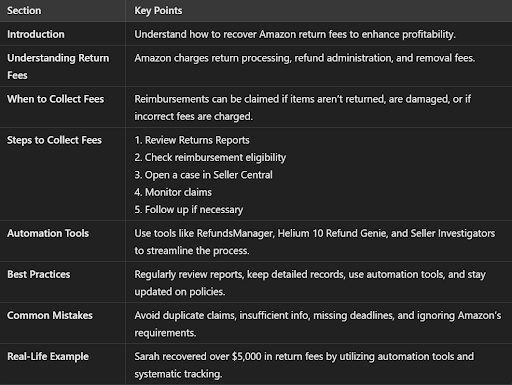
Handling returns is an inevitable part of selling on Amazon, but did you know that you can recover some of the costs associated with these returns? While Amazon charges sellers return fees, there are specific situations where you may be eligible for reimbursement. This involves claiming fees when Amazon mishandles the return process, such as failing to credit fees correctly or improperly restocking returned items. Understanding how to collect Amazon return fees can help you recover lost revenue and enhance your business's profitability. In this guide, we’ll show you the quickest way to collect Amazon return fees, detailing the steps for submitting claims, tracking reimbursements, and best practices to ensure you get your money back.
1. Understanding Amazon Return Fees

Amazon levies various fees when processing returns for sellers who use Fulfillment by Amazon (FBA). These return fees include:
-
Return Processing Fees: Charged when customers return a product to handle the return and restocking.
-
Refund Administration Fees: Amazon retains a portion of the original sale fee when issuing a refund to the customer.
-
Removal Fees: If a returned item is unsellable, sellers may incur fees to remove the item from Amazon’s fulfillment center, either through disposal or return to the seller.
However, there are specific situations where sellers may be eligible for reimbursement or recovery of these return fees.
2. When Can You Collect Amazon Return Fees?
You can collect return fees or receive reimbursement in the following scenarios:
-
Customer Did Not Return the Item: If Amazon issues a refund but the item is not returned within the specified timeframe (usually 45 days), you may be eligible for reimbursement.
-
Returned Item Was Damaged Due to Amazon’s Handling: If an item is damaged while being processed at the fulfillment center or during the return, you can file a claim.
-
Incorrect Fees Were Charged: If you notice that Amazon charged incorrect return or refund administration fees, you can request a refund.
-
Returned Item Not Restocked Correctly: If a returned item is not restocked into your inventory, you may qualify for reimbursement.
3. Step-by-Step Guide to Collecting Amazon Return Fees
To recover Amazon return fees efficiently, follow these steps:
Step 1: Review Your Returns Reports
Start by checking your Returns Reports to identify discrepancies with refunded items. Access this report in Amazon Seller Central by going to Reports > Fulfillment > Returns. Filter the report by date to review recent returns.
Tip: Look for items where a refund was issued, but the item has not been returned or restocked.
Step 2: Check Your Reimbursement Eligibility

Determine whether the return fees qualify for reimbursement based on the following criteria:
-
The customer did not return the item within 45 days of the refund.
-
The item was returned in damaged condition due to Amazon’s handling.
-
Incorrect return fees were charged.
Step 3: Open a Case in Amazon Seller Central
If you find eligible reimbursement cases, submit a claim through Amazon Seller Central by navigating to Help > Get Support > Selling on Amazon. Select Fulfillment by Amazon (FBA) and choose FBA Inventory Reimbursement, then provide necessary details like Order ID, ASIN, and refund date.
Step 4: Monitor Your Claim
Claims are typically reviewed by Amazon within 7-10 business days. Keep track of the case status in Seller Central and be ready to provide additional documentation if requested.
Step 5: Follow Up if Necessary
If your claim is denied or you do not receive a response within the expected timeframe, consider reopening the case with more information or escalating it for a higher-level review.
4. Using Tools and Software to Automate the Process

To streamline the process of collecting Amazon return fees, consider utilizing third-party tools that can help identify reimbursement opportunities and automate claims submission:
-
RefundsManager: Scans your Amazon account for discrepancies and files claims on your behalf.
-
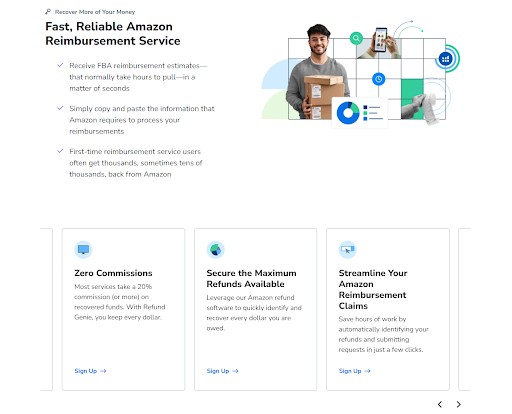
Helium 10 Refund Genie: Analyzes your account for potential reimbursement claims, providing reports for filing.
-
Seller Investigators: Specializes in auditing Amazon accounts to recover lost revenue from return fees.
These tools save time and ensure you don’t miss eligible reimbursement opportunities.
5. Best Practices for Collecting Amazon Return Fees
Implement these best practices to maximize your reimbursements:
-
Regularly Review Your Returns Reports: Schedule weekly or monthly checks to catch potential issues early, identifying discrepancies before the reimbursement window closes.
-
Keep Detailed Records: Maintain accurate records of your inventory, return transactions, and cases filed with Amazon to support your claims.
-
Use Automation Tools: Leverage tools like RefundsManager, Helium 10 Refund Genie, or Seller Investigators to automate the identification and filing of claims.
-
Follow Up on Unresolved Cases: If a claim is denied or unresolved, reopen the case with additional details or escalate for further review.
-
Stay Updated on Amazon’s Policies: Keep informed about the latest reimbursement guidelines to ensure compliance and optimize your claims process.
6. Common Mistakes to Avoid When Filing Reimbursement Claims
Avoid these pitfalls to increase your chances of a successful reimbursement:
-
Filing Duplicate Claims: Submit only one claim per issue to prevent confusion and rejection.
-
Not Providing Enough Information: Include relevant details such as Order IDs, ASINs, and documentation to strengthen your claim.
-
Missing the Reimbursement Window: Be mindful of time limits for claims, such as 45 days for customer returns.
-
Ignoring Amazon's Requirements: Ensure your claims align with Amazon’s criteria to avoid rejection.
7. How One Seller Recovered Over $5,000 in Return Fees| Applying today’s learnings

Hypothetical Case Study: Sarah, a home goods seller on Amazon, faced a high volume of returns. By using Helium 10 Refund Genie, she discovered many returned items were not being restocked, and several refunds were issued without item returns.
Actions Taken:
-
Sarah reviewed her Returns Report and identified over 30 cases of unreturned items.
-
She filed reimbursement claims through Amazon Seller Central, providing the required documentation.
-
Utilizing Seller Investigators, she automated claim submissions for other discrepancies.
Outcome: Sarah successfully recovered over $5,000 in return fees within three months and implemented a weekly review process to catch future discrepancies early.
Conclusion
Collecting Amazon return fees can significantly boost your bottom line by recovering revenue that would otherwise be lost. By understanding the types of return fees, knowing when you’re eligible for reimbursement, and following a structured claims process, you can maximize your chances of getting your money back. Don’t overlook the power of automation tools to streamline this process, and always stay informed about Amazon’s policies. Implement these tips to make collecting return fees quick and efficient.
If you need personalized guidance or help fine-tuning your strategies, Superfuel AI can assist. Our AI-powered assistant analyzes 36+ key Amazon metrics to identify and address the root causes of sales fluctuations, helping you optimize your storefront and boost sales. Reach out to us at support@superfuel.io.
--
Ben Mathew, Amazon Expert
Ben Mathew is a co-founder at Superfuel, a sales assistant for Amazon sellers. In the past, Ben and his team of e-commerce specialists and software engineers have launched 40+ new brands on Amazon, taking them from zero to bestsellers. In his free time, he is either learning from other top sellers or encouraging his 3 daughters in their love for reading. He is reachable at ben [at] superfuel.io.
FAQs
-
How long do I have to file a reimbursement claim for Amazon return fees?
- Typically, you have 45 days from the date of the refund to file a claim for unreturned items.
-
What types of return fees can be reimbursed?
- Reimbursable return fees include cases where the customer did not return the item, the returned item was damaged due to Amazon's handling, or incorrect fees were charged.
-
Can I automate the process of collecting Amazon return fees?
- Yes, tools like RefundsManager, Helium 10 Refund Genie, and Seller Investigators can help automate claims identification and filing.
-
How do I track the status of my reimbursement claim?
- You can monitor your claim status in Amazon Seller Central under the case log, with reviews typically completed within 7-10 business days.
-
What should I do if my reimbursement claim is denied?
- If denied, reopen the case with additional documentation or escalate the issue for higher-level review. Persistence can improve your chances of success.